本記事ではバージョン管理ツールのGitのインストール方法について画像付きで詳しく紹介します。
※本記事はWindows向けの手順を紹介しています
- はじめに
- Gitとは
- GitHubやGitLabとGitの関係性
- Gitのインストール手順
- Gitのダウンロード
- Gitのインストール
- Information
- Select Destination Location(インストール先の選択)
- Select Components(インストールのオプション選択)
- Select Start Menu Folder(スタートメニューでの表示名設定)
- Choosing the default editor used by Git(デフォルトエディタ設定)
- Adjusting the name of the initial branch in new repositories(ブランチ名設定)
- Adjusting your PATH environment(ソフトウェア選択)
- Choosing the SSH executable(クライアントプログラムの指定)
- Choosing HTTPS transport backend(SSL/TLSライブラリの指定)
- Configuring the line ending conversions(改行コードの設定)
- Configuring the terminal emulator to use with Git Bash(ターミナルのエミュレータ選択)
- Choose the default behavior of `git pull`(pull時のデフォルト動作設定)
- Choose a credential helper(資格情報ヘルパー選択)
- Configuring extra options(その他オプション設定)
- Configuring experimental options(実験的なオプションの設定)
- インストール後の確認
- まとめ
はじめに
本記事ではバージョン管理ツールであるGitをインストールする方法を画像付きで詳しく紹介します。
Gitとは
Gitとはソースコードなどを管理しやすくするために利用されるソフトウェアで、バージョン管理ツールの一種です。
バージョン管理ツールの中でも特に「分散型」という種類に分類されます。
Stable Diffusion利用時に必要
Gitは、Stable Difusion(「入力されたテキスト」をもとに画像を生成するAIモデル)を使う際に必要となります。
Stable DifusionのコードはGitで管理されており、Gitを使うことでコマンドひとつで環境構築を楽に行うことができます。
Stable Difusionについての詳細は、以下記事をご参照ください。

GitHubやGitLabとGitの関係性
Gitはバージョン管理システムですが、GitHubやGitLabはGitシステムの上に構築されるツールやプラットフォームです。
Gitのインストール手順
Gitのダウンロード
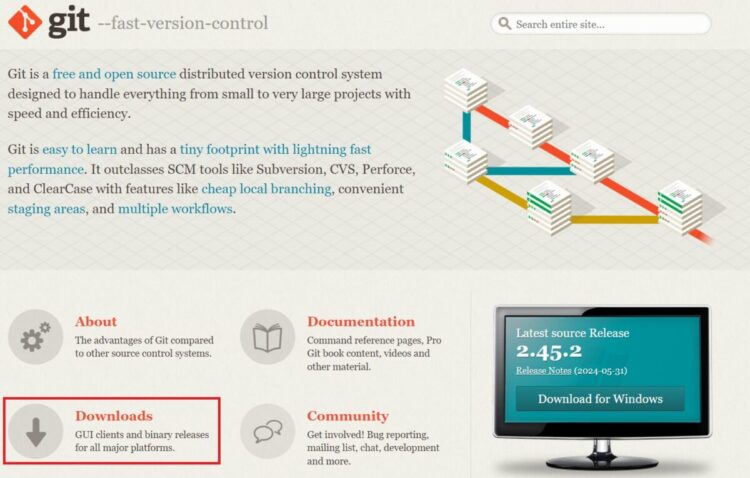
公式ページにアクセスし、「Downloads」をクリックします。
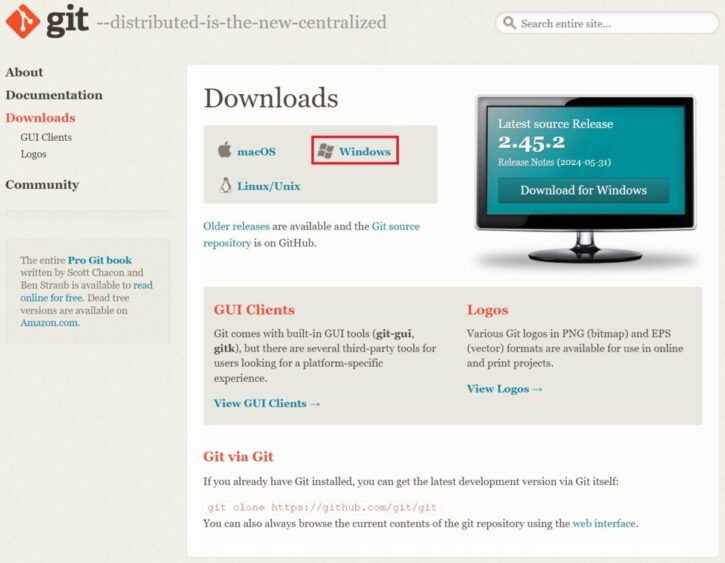
インストールするOSを選択します。今回はWindowsをクリックします。
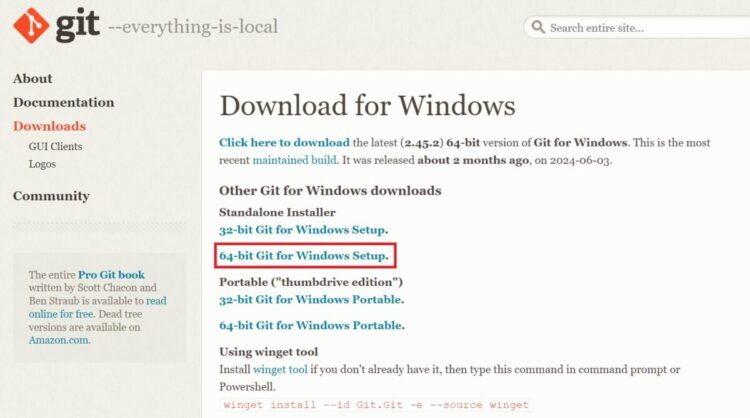
環境をUSBメモに入れて持ち運びたいなどでなければ、Standalone Installerをクリックします。
OSにより、32bitか64bitを選択します。今回は64bitをクリックします。
クリックすると、ダウンロードが始まります。
Gitのインストール
ダウンロードしたインストーラを起動します。
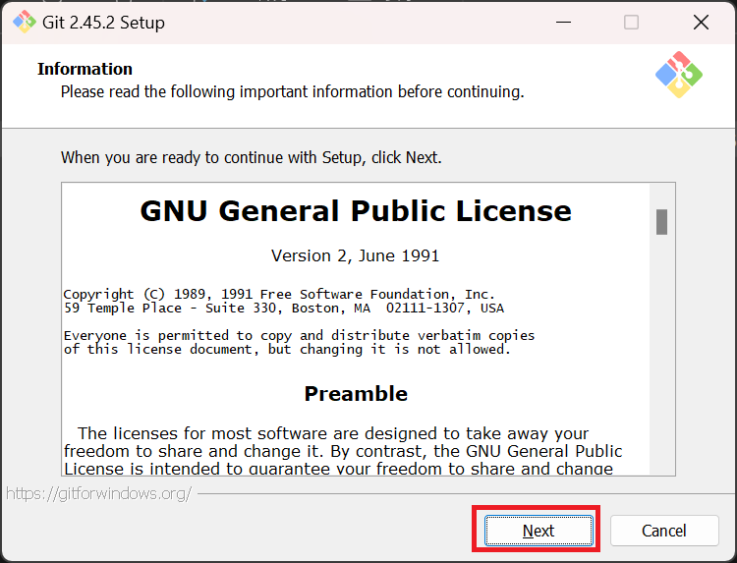
Information
ライセンスの内容を確認して、問題なければNextをクリックします。
Select Destination Location(インストール先の選択)
インストール先を選択し、「Next」をクリックします。こだわりがなければデフォルトのままでよいと思います。

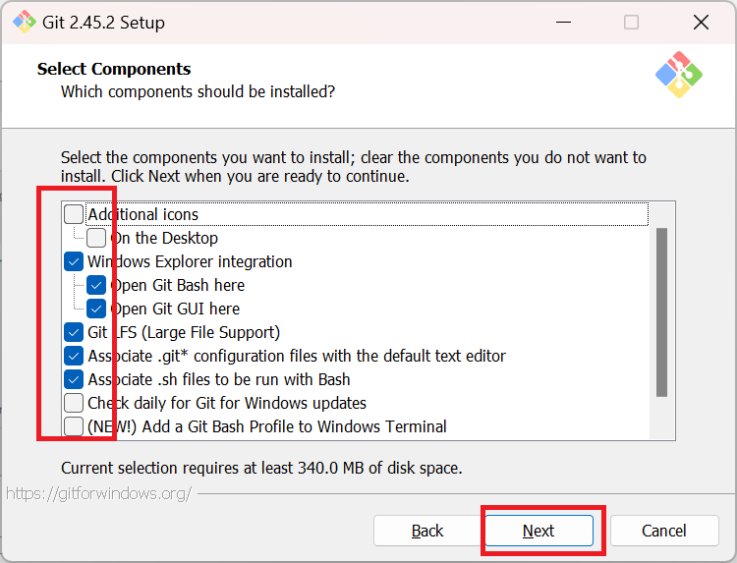
Select Components(インストールのオプション選択)
インストールのオプションを選択します。必要なものにチェックを入れます。以下のような内容です。
- Additional icons – On the Desktop:アイコンをデスクトップに置く。
- Windows Explorer integration: コンテキストメニュー(右クリック時のメニュー)に追加する
- Open Git Bash here: Git Bashを追加する
- Open Git GUI here: Git GUIを追加する
- Git LFS(Large File Support): Gitで100MB以上の大容量ファイルを扱うときはチェック。最近のGitHub上のサイトは余裕で超えることが多いのでチェック必須です。
- Associate .git* configuration files with the default text editor: .git」で始まる設定ファイルを規定のテキストエディターと関連づける。
- Associate .sh files to be run with Bash: 「.sh」ファイルをGit Bashで実行する。
- Check daily for Git for Windows updates: 毎日Git for Windowsのアップデートがあるか確認する。
- Add a Git Bash Profile to Windows Terminal: Windows上でBashが使えるようにするものです。後から必要になった際の手間を考えると、最初からチェックしておくといいでしょう。
- Scalar (Git add-on to manage large-scale repositories): Scalarを使えるようにするものです。大規模なリポジトリを利用する際に、効率的に扱うことができるコマンドのようなもののようです。こちらも最初からチェックしておくといいでしょう。
Select Start Menu Folder(スタートメニューでの表示名設定)
Startメニューに表示する名前を指定します。そもそも作らない場合は左下にチェックをして、「Next」をクリックします。

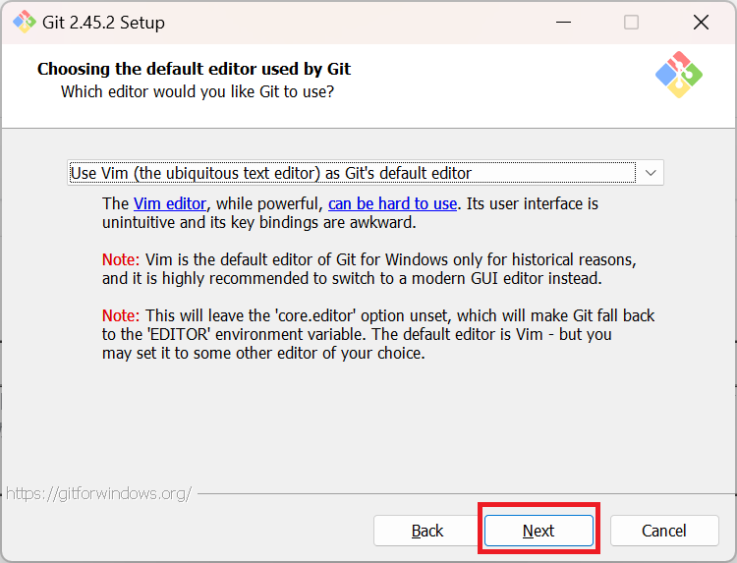
Choosing the default editor used by Git(デフォルトエディタ設定)
Gitが使用するデフォルトのエディタを選択します。
Gitでメッセージの編集など様々な場面で、テキストを編集する場面があります。その際に何を使うかという選択をします。様々なエディタがあるので、好んで利用するものがあればそれを選択し、「Next」をクリックします。
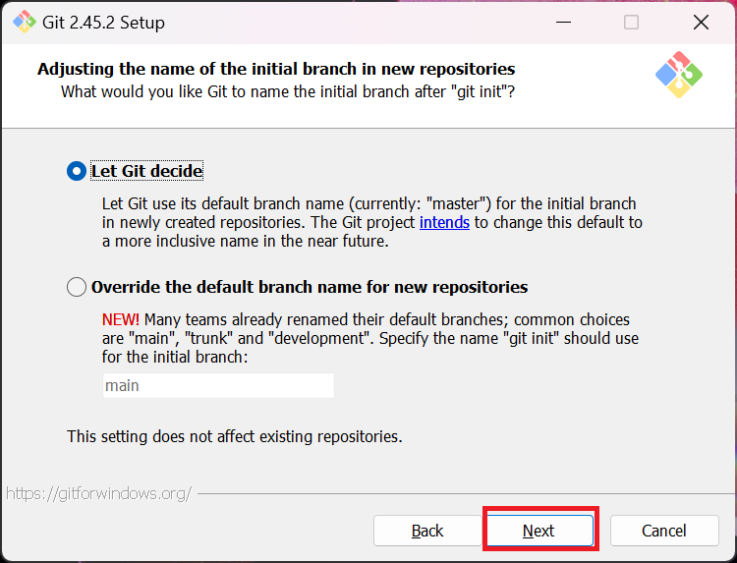
Adjusting the name of the initial branch in new repositories(ブランチ名設定)
新しいリポジトリを作る際のブランチ名を記載し、「Next」をクリックします。
- Let Git decide: Gitでのデフォルトブランチの「master」になります。将来的に変わる可能性もあります。
- Override the default branch name for new repositories: 自由に指定します。すでに使っているものがあるならそれを指定します。
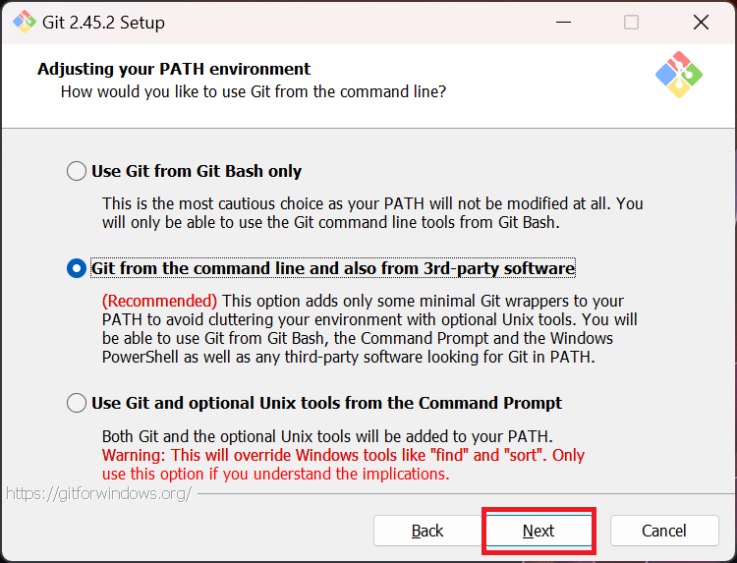
Adjusting your PATH environment(ソフトウェア選択)
Gitコマンドの操作できるソフトウェアを指定し、「Next」をクリックします。
- Use Git from Git Bash only: Git bashのみからGitを利用する。これを選択するとGitコマンドがGit bash以外から使えません。
- Git from the command line and also from 3rd-party software: コマンドラインとサードパーティ製ソフトウェアからGitを利用する。
- Use Git and optional Unix Tools form the Command Prompt: コマンドプロンプトからGitとオプションのUnixツールを利用する。
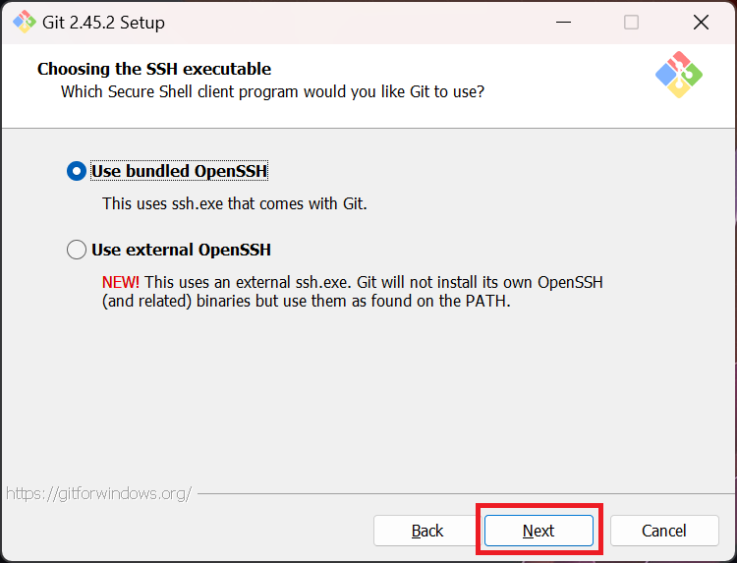
Choosing the SSH executable(クライアントプログラムの指定)
SSH(Secure Shell)のクライアントプログラムを指定し、「Next」をクリックします。
- Use bundled OpenSSH: Gitと一緒に入っているsshを利用します。
- Use external OpenSSH: システムのパスに存在するsshを利用します。
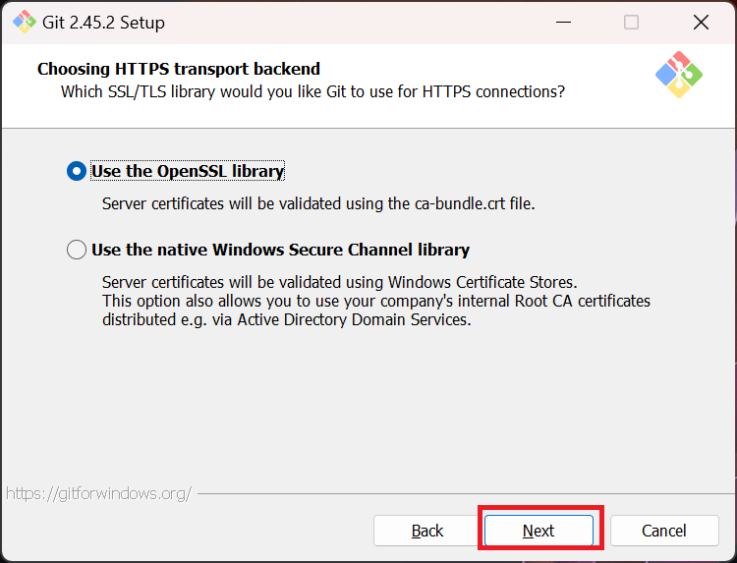
Choosing HTTPS transport backend(SSL/TLSライブラリの指定)
HTTPS通信を行う際、Gitが利用するSSL/TLSライブラリを指定し、「Next」をクリックします。
- Use the OpenSSL library: OpenSSLライブラリを使用します。
- Use the native Windows Secure Channel library: WindowsのSSLライブラリを使用します。
社内などの独自な証明書を利用する場合は、下を選択するとよいでしょう。
Configuring the line ending conversions(改行コードの設定)
改行コードの扱いを指定し、「Next」をクリックします。
- Checkout Windows-style, commit Unix-style line ending:Windows形式でチェックアウトして、Unix形式でコミット
- Checkout as-is, commit Unix-style line endings:チェックアウトはそのままにしてUnix形式でコミット
- Checkout as-is, commit as-is:どちらもそのまま
ほかの開発者との兼ね合いで決めるとよいと思います。周りもWindowsで開発するならWindowsの改行コードでよいですが、macなども混在するならそのままかunixにするとよいでしょう。

Configuring the terminal emulator to use with Git Bash(ターミナルのエミュレータ選択)
Git Bashを利用する際のターミナルのエミュレータを選択し、「Next」をクリックします。
- Use MinTTY(the default terminal of MSYS2): MinTTYというターミナルのエミュレータを利用
- Use Windows’ default console window: コマンドプロンプト(cmd.exe)を利用

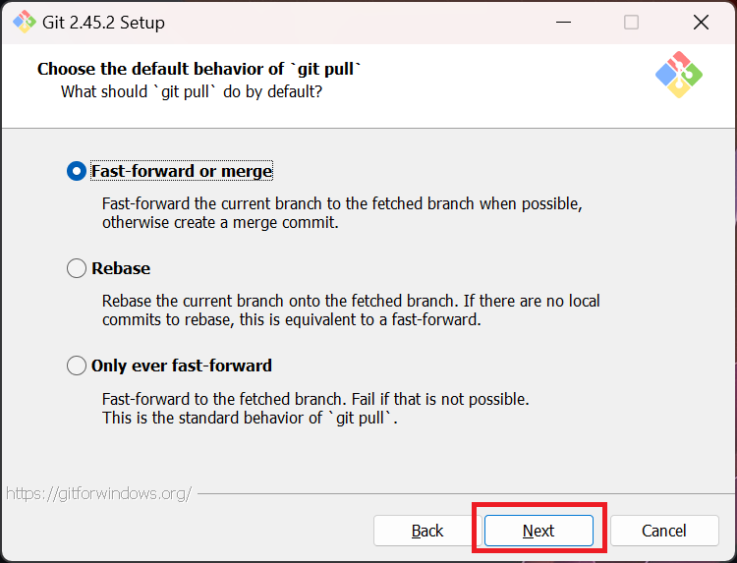
Choose the default behavior of `git pull`(pull時のデフォルト動作設定)
git pullコマンド実行時のデフォルト動作を指定し、「Next」をクリックします。
- Fast-forward or merge: git標準の動作
- Rebase: リベースする
- Only ever fast-forward: ファイスフォワードする
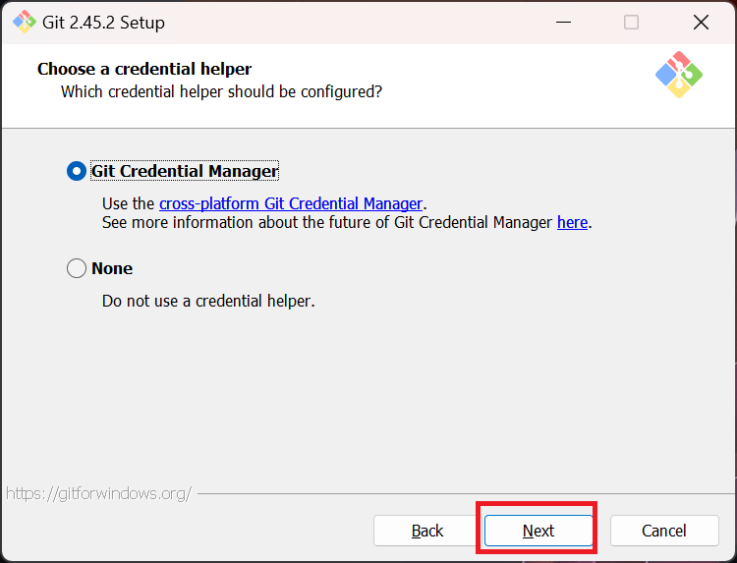
Choose a credential helper(資格情報ヘルパー選択)
資格情報ヘルパーを選択し、「Next」をクリックします。
- Git Credential Manager: Gitの資格情報ヘルパーを指定する
- None: なし
Configuring extra options(その他オプション設定)
その他のオプションを指定し、「Next」をクリックします。
- Enable file system caching: 処理をキャッシュする
- Enable symbolic links: シンボリックリンクを有効にする

Configuring experimental options(実験的なオプションの設定)
実験的なオプションを指定し、「Install」をクリックします。
- Enable experimental support for pseudo consoles.: Git Bash上でpythonプログラムなど動作させることができる
- Enable experimental built-in file system monitor: 大量のファイルがある場合にGitコマンドが早くなる

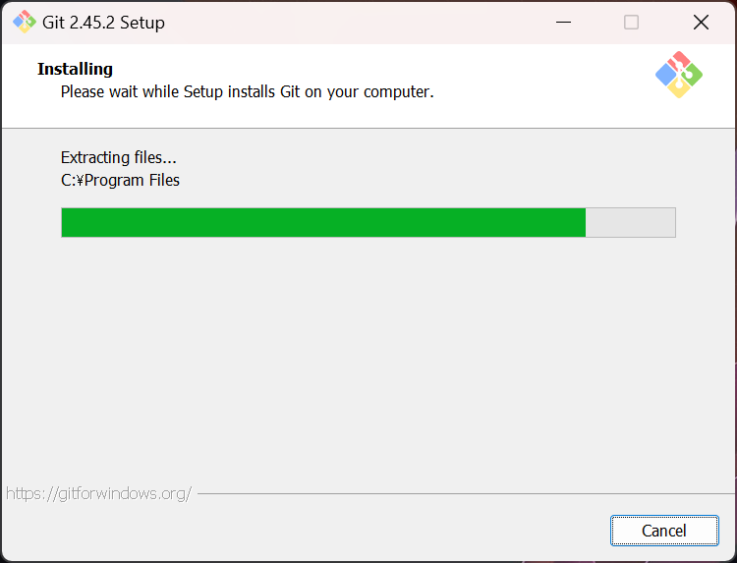
インストールが進みます。
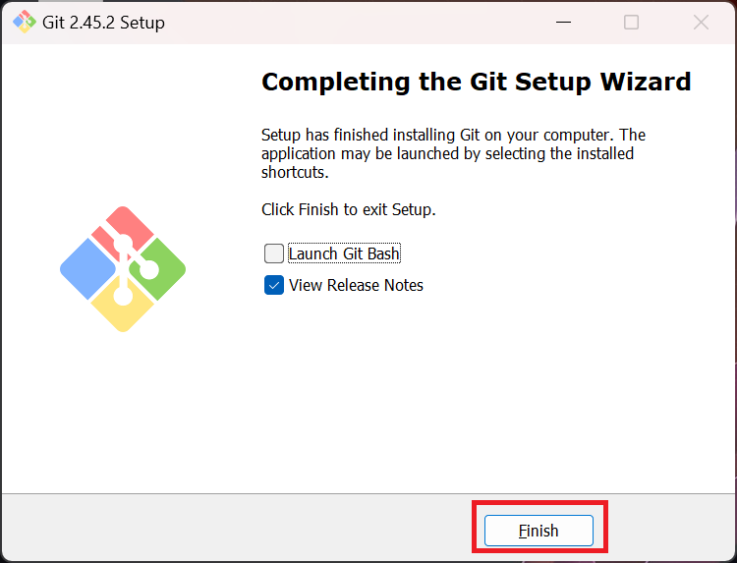
終われば「Finish」をクリックします。
インストール後の確認
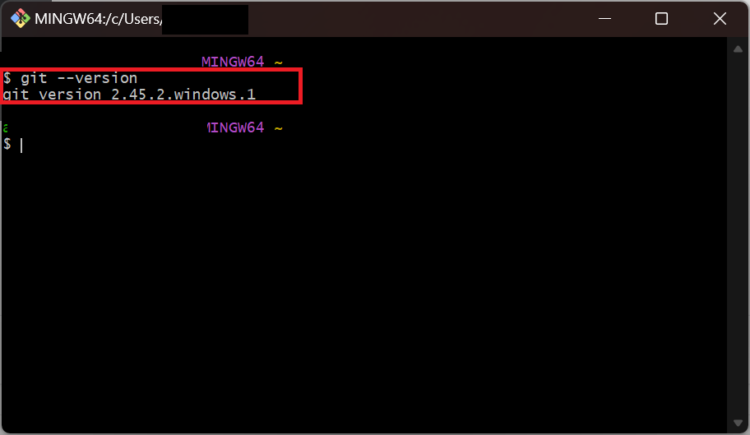
コマンドプロンプトでも利用できるオプションを指定している場合はコマンドプロンプトを起動し、以下のコマンド入力します。
パスが通っていればバージョンが表示されます。
git --version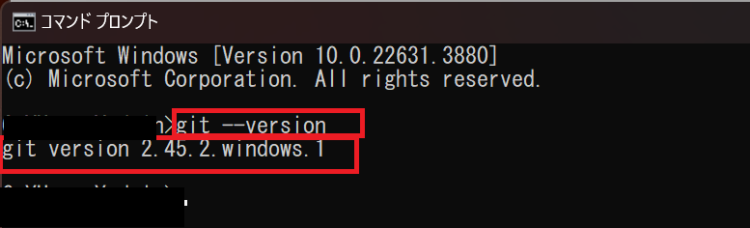
Bashをインストールした場合は、プログラムの中にGit Bashがありますので、起動します。
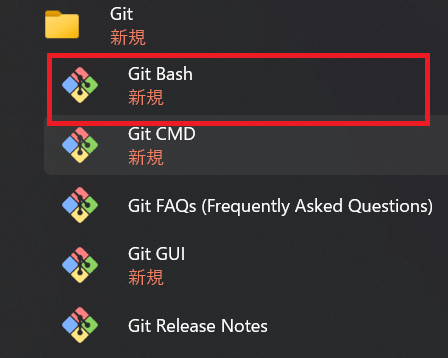
以下のコマンド入力します。バージョン情報が出れば問題なくインストールされています。
まとめ
本記事では、Gitのインストール方法について画像付きで詳しく紹介しました。
不明点やつまづいた点等がありましたら、お気軽にコメントやお問い合わせからご連絡いただけますと幸いです。
▼関連記事:GitHubの使い方(アカウント作成・基本操作・Gitとの違い)


コメント